In some situations you'll want to put a hold on the guest's credit card without charging it, or Pre-Authorize the card, and then be able to Capture that payment at the end of stay. This can be initiated from any Invoice, from the the Dashboard and through the Check-in Wizard.
Contents of this article:
- Pre-Auth through the Check-In Wizard
- Using the Pre-Auth Card button on an Invoice
- Updating and Capturing a Pre-Auth
Pre-Auth through Check-In Wizard
To authorize a card through the Check-in Wizard, as shown in the following video:
- Select the reservation and click the Check-In button (in this case we are doing so from the Dashboard).
- From the options listed, make sure that Pre-Auth Credit Card is selected and not Add a Payment (you can do one or the other, but not both).
- Click Check-In to proceed with the check-in process. On the Pre-Auth screen, verify the amount and click Pre-Auth Card in the top right to proceed.
- Choose Card Present if the card is present and ready to swipe or insert or choose Not Present / On File to manually enter a card or use a credit card that is already on file.
- After the pre-auth transaction completes, you'll be presented with the Pre-Auth Details screen which optionally allows you to Print a Receipt (and other possible options).
- Click Continue to proceed with the check-in process.
Using the Pre-Auth Card button on an Invoice
The Pre-Auth Card button is visible anywhere an invoice is editable. You will find it:
On the Dashboard: 
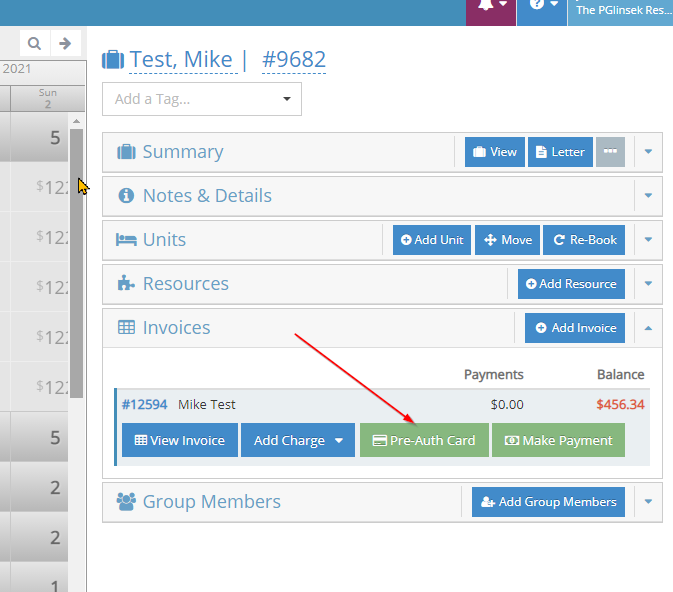
Within the Invoices section of a Reservation:
And within the Transactions section of an Invoice: 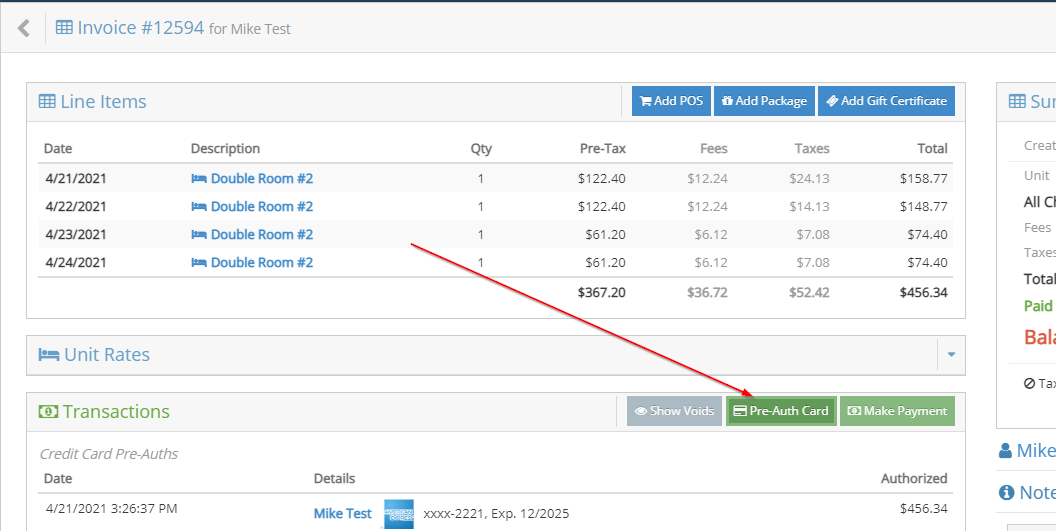
Pre-Authorizing a card using the Pre-Auth Card button will work just like it does during the Check-In Wizard:
- Click the Pre-Auth Card button.
- On the Pre-Auth screen, verify the amount and click Pre-Auth Card in the top right to proceed.
- Choose Card Present if the card is present and ready to swipe or insert or choose Not Present / On File to manually enter a card or use a credit card that is already on file.
- After the pre-auth transaction completes, you'll be presented with the Pre-Auth Details screen which optionally allows you to Print a Receipt (and other possible options).
- Finally, click the Done button to proceed.
Updating and Capturing a Pre-Auth
To update (increase the value) of an existing pre-authorization:
- Open the invoice where the pre-auth was created.
- Click on the pre-auth transaction you wish to update/change in the Transactions section.
- Click on Update.
- Verify the amount and then click on Update Pre-Auth in the top right.
- After the update transaction completes, you'll be presented with the Pre-Auth Details screen which optionally allows you to Print a Receipt (and other possible options).
- Finally, click the Done button to proceed.
To capture the pre-authorization:
- Open the invoice where the pre-auth was created.
- Click on the pre-auth transaction you wish to capture in the Transactions section.
- Click on Capture Payment.
- Verify the amount and then click on Capture Pre-Auth in the top right.
- After the capture transaction completes, you'll be presented with the Payment Details screen which optionally allows you to Print a Receipt (and other possible options).
- Finally, click the Done button to proceed.