
-
Navigate to the Configuration tab and select Rate Plans (Unit Types).

-
Select Add New Rate Plan.

- Complete the fields on the Add New Rate Plan page:
- Create a Rate Plan Name.
- Assign a Default Revenue Account.
- Assign a Default Tax Group.
- Assign a Default Fee Group, if applicable
- Enter a Rate Plan Description,
- Click Save.

- After saving, select Add a Rate.

- Complete the fields on the Edit Rate Settings page.

- Select Save on the top right corner.
-
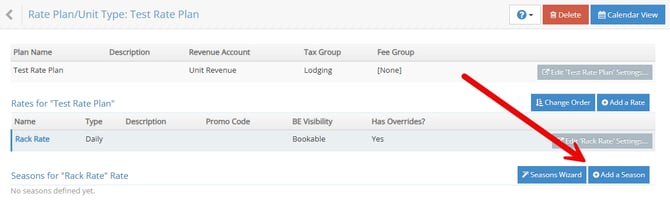
Next, select Add a Season on the rate plan you just created.
- You have three options for defining seasonal rates:

-
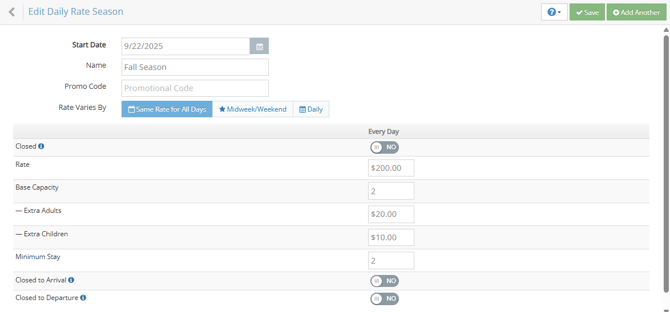
Same Rate for All Days
With this option, the rate remains the same regardless of the day of the weeK.
- Enter a Start Date and a Name (Optional)
- Define the Base Rate, Base Capacity, Extra Person Charges, and Minimum Stay.
- Click Save.
-
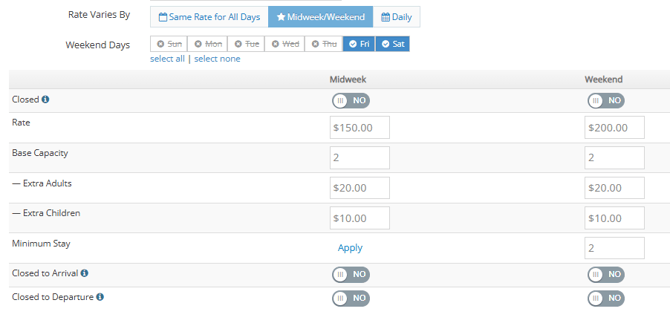
Rates Vary By Midweek/Weekend
With this option, you set different rates for midweek and weekend stays and specify which days count as weekend days.
- Enter a Start Date and a Name (Optional)
- Define Weekend Days using the drop-down menu.
- Set the Base Rate for Midweek and Weekend Stays.
- Define the Base Capacity, Extra Person Pharges, and Minimum Stay.
- Click Save.
-
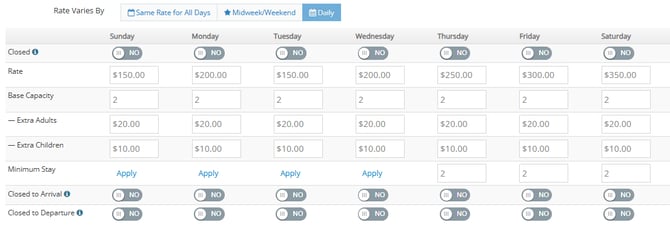
Rates Vary Daily
With this option, you set a distinct rate for every individual day of the week.
- Enter a Start Date and a Name (Optional)
- Define each rate per day of the week.
- Click Save.
-
- You have three options for defining seasonal rates: