
Table of Contents:
 POS Invoices are simply stand-alone invoices. They are not connected to any person or any reservation within rezStream Cloud. This type of invoice is great for what is commonly referred to as "Cash Sales" but of course, your customer doesn't have to pay with cash - they could use any payment type that your business supports, including credit cards.
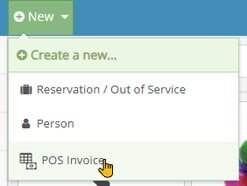
2. Alternatively, you can use the green New menu in the upper left corner of the app and choose the POS Invoice menu option.
3. Or from the Invoices section, click/tap the Add POS Invoice button in the upper right corner.

4. From there, the created category options will be displayed, allowing you to easily tap the desired category to select an item. Tapping the item multiple times will increase its quantity.

5. After choosing a category, you can tap a POS Item to add it to the cart. Tapping the POS item multiple times will increase its quantity. NOTE: If your POS items have images, the first image in the list will be displayed in the UI.

6. Once items are in your cart, select Retail Sale to go to the Make Payment screen. After completing a payment, you will see the Retail Invoice. 
NOTE: POS Invoices will always have the name "Retail Sale" and an Invoice icon with a dollar bill sub-icon. Additionally, no person or reservation is attached to the invoice (normally shown above the Notes section).


POS Invoices for People work exactly like Retail Sale invoices with one exception, they are connected to a person or guest within rezStream Cloud. If you know the person making the purchase, it's always best to associate that revenue with that person for historical tracking purposes. This can work great for a number of other scenarios as well, for example, a local visitor who regularly buys or rents things from you but is not a guest and maybe even keeps an open tab with you and pays it off periodically.
POS Invoices for People can be created a few different ways:
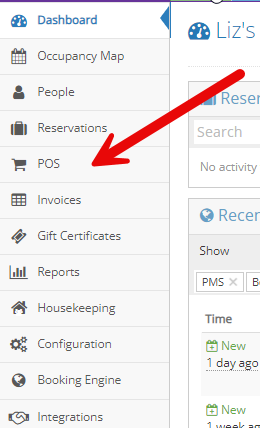
1. Navigate to the POS tab from the main menu.
2. Alternatively, you can use the green New menu in the upper left corner of the app and choose the POS Invoice menu option.
3. Or from the Invoices section, click/tap the Add POS Invoice button in the upper right corner.
4. From there, the created category options will be displayed, allowing you to easily tap the desired category to select an item. Tapping the item multiple times will increase its quantity.
5. After choosing a category, you can tap a POS Item to add it to the cart. Tapping the POS item multiple times will increase its quantity. NOTE: If your POS items have images, the first image in the list will be displayed in the UI.
6. Once items are in your cart, select Assign To... to navigate to the Add Charges to Invoice screen.

7. Tapping this option allows you to create a new invoice for a person (or assign these charges to an existing invoice, more on that below). This action simply adds those charges to the invoice and then displays it. 
You can also add an invoice from the Person screen. Click/tap the Add an Invoice button in the POS Invoices section:

NOTE: POS Invoices for People will always have the name of the guest and an Invoice icon with a person (guest) sub-icon. Additionally, the person associated with the Invoice will be shown between the Summary and Notes sections along with a drop-down toggle to quickly view the summary information about that person and a View button to view all the details for that person.

Invoices within reservations allow for different guests and group members to have separate invoices or bills for that specific stay. A reservation always has at least one invoice that is automatically connected to the primary guest and additional invoices can be created by:
- Assigning group members to units and transferring the charges to a new invoice for that guest.
- Manually create invoices for group members for things like incidental charges by using the Add an Invoice button within the reservation.
You can add POS items to existing invoices on a reservation in a few different ways:
1. Navigate to the POS tab from the main menu.

2. Alternatively, you can use the green New menu in the upper left corner of the app and choose the POS Invoice menu option.

3. Or from the Invoices section, click/tap the Add POS Invoice button in the upper right corner.

4. From there, the created category options will be displayed, allowing you to easily tap the desired category to select an item. Tapping the item multiple times will increase its quantity.

5. After choosing a category, you can tap a POS Item to add it to the cart. Tapping the POS item multiple times will increase its quantity. NOTE: If your POS items have images, the first image in the list will be displayed in the UI.

6. Once items are in your cart, select Assign To... to navigate to the Add Charges to Invoice screen.

7. By default, when selecting the Assign To... option, you will see 'Active Invoices’ which include:
- Invoices linked to reservations arriving, in-house, or departing today,
- POS Invoices with an outstanding balance.
The Active Invoices list allows you to quickly filter by searching for various data points such as name, unit name, invoice number, or reservation number.

8. Upon choosing an invoice, those charges will be added to the selected invoice and display it.

You can also add a new invoice to an existing reservation from the Reservations screen. Click/tap the Add Invoice button in the Invoices section.

NOTE: Reservation Invoices will always have the name of the guest and an Invoice icon with a suitcase (reservation) sub-icon. Additionally, the person and the reservation associated with the Invoice will be shown between the Summary and Notes sections along with drop-down toggles to quickly view the summary information for each and a View button to view all the details for each.