- The Properties of a Unit Tag
- Managing Unit Tags (Amenities)
- Applying Unit Tags (Amenities) to Units
- A Note About Emojis 👍🏽
The Properties of a Unit Tag
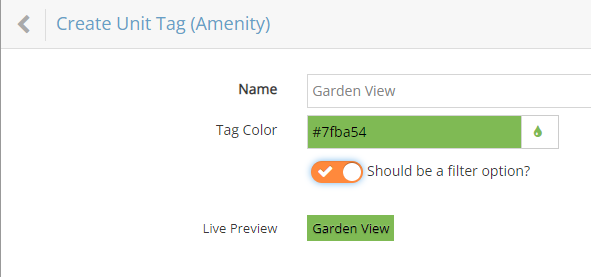
A Unit Tag (Amenity) displays the Name, a Tag Color, and a toggle to indicate whether this tag Should be a filter option? (Filterable).
NOTE: Currently, the Tag Color is ONLY shown within rezStream Cloud. It is not used in the Booking Engine display of Unit Tags/Amenities.
In the Booking Engine, only the Unit Tags that are flagged as Filterable will appear in the Sort & Filter section.
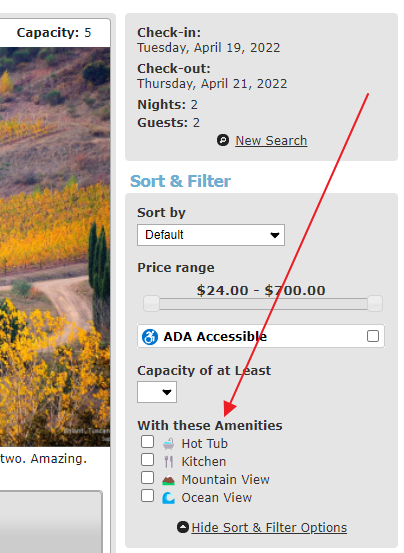
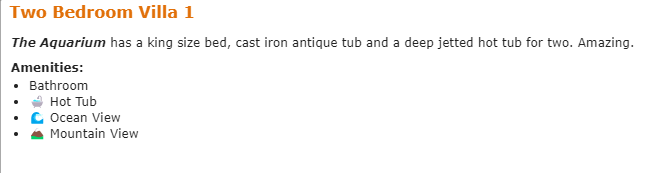
However, all Unit Tags (Amenities) that you've applied to a unit will appear in the Unit Description area of those units within your Booking Engine. Notice in the following unit description for Two Bedroom Villa 1 that the Bathroom amenity appears but the Bathroom amenity is not Filterable and therefore not shown in the Sort & Filter area above.
Managing Unit Tags (Amenities)
- Navigate to the Configuration tab.

- Select Unit Tags (Amenities).
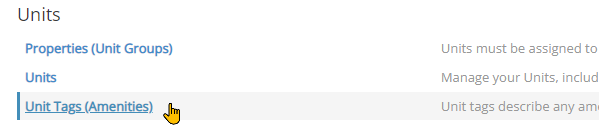
- A listing of all the Unit Tags/Amenities you have configured so far will be displayed. Select an existing Unit Tag to update it or use the Add New Tag button to create a new one.
- To remove a Unit Tag, select the Delete button on the Edit Unit Tag view.
Applying Unit Tags (Amenities) to Units
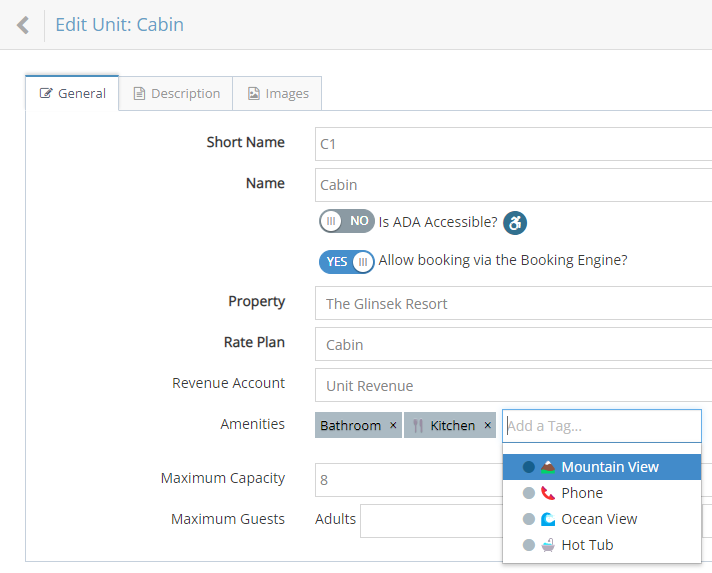
Once you've created your list of Unit Tags, you can apply them to your individual units.
- Navigate to the Configuration tab and select Units.
- Select the unit that you'd like to apply Tags/Amenities.
- Choose any Tags/Amenities that apply to that particular unit.
- Click/tap Save Unit to save your changes
A Note About Emojis 👍🏽
As shown in some of the screenshots above, it is possible to use Emojis to give your Unit Tags (Amenities) some flare and graphic qualities. Emojis are widely supported and most devices and browsers will display them as shown in the screenshots.
However, it is worth noting that different devices and browsers may display their own version of the Emoji that you have chosen. Therefore, they may look slightly different to guests using your Booking Engine depending on the device or browser that your guest is using.
How to Add Emojis to Unit Tags (Amenities)
You can add emojis to your Unit Tags (Amenities) to make them more visually appealing and easier for guests to recognize on your Booking Engine.
- Navigate to the Configuration tab and select Unit Tags (Amenities).
- Select an existing tag or click Add New Tag.
- Click inside the Name field.
- To insert an emoji:
- Windows: Press Windows + . (period) to open the emoji picker.
- Mac: Press Control + Command + Space to open the emoji picker.
- Alternatively: Visit Emojipedia to find an emoji, then copy and paste it into the Name field.
- Select your desired emoji and place it before or after the tag name.
- Click Save to apply your changes.
Example: Instead of naming your tag Hot Tub, you can enter ♨️ Hot Tub.
Note: Emojis may appear differently depending on the device or browser your guests use. We recommend choosing commonly supported emojis.
You should also be aware that some Emojis are not available at all on some devices and browsers. For example, the Melting Face Emoji is only available on a small subset of devices and browsers. Devices that do not support an Emoji will usually display an empty rectangle icon ( ) in its place. So, if you decide to use Emojis in your Unit Tags (Amenities), you should use some care and only use Emojis that are widely supported.